*Image by Studio McGee
The holidays are a magical time filled with family, friends, and cherished traditions. Whether your family loves cozy game nights, crafting ornaments, making homemade gifts, or simply enjoying a warm cup of cocoa, your home is the perfect place to make space for these special moments. With a little creativity and thoughtful planning, you can transform even the smallest nook in your home into a hub of holiday joy. Here’s how to give your home a festive reset and make room for new family traditions!
Maximizing Your Space for the Holidays
Get your home holiday-ready by starting with a decluttering session. Getting organized is the perfect way to reset and create space for the season ahead. A little pre-holiday purging can work wonders -- I like to think of it as clearing out the old to make way for festive cheer. Whether your home has a dedicated space for holiday activities or you’re working with cozy quarters, getting organized can transform even the tiniest nooks into an area for a magical celebration.
Make room for decorations, new gifts, and cherished traditions while uncovering hidden corners that can shine with holiday charm. Double-duty furniture, like storage ottomans or folding tables, can quickly become functional holiday stations, easily stowed away when not needed. Rolling carts and stackable bins are your best friends for ultimate versatility. They make setting up and breaking down your holiday space effortless. Once you feel a little more organized, let the fun begin! Here are some ideas for holiday tradition zones you can incorporate into your home during the festive season.
Holiday Game Night: Creating a Corner for Fun
Transform family game night into an unforgettable experience by creating a dedicated space for holiday game night fun and bonding. Even a small, overlooked corner of your living room, den, or guest room can be repurposed into a cozy game night nook.
Comfortable seating is an essential feature of any game zone. Game night doesn’t have to happen at the dining room table. The family can gather around the coffee table to make things feel more casual and comfortable. Keep a stack of floor cushions near the fireplace, ready to pull out for a kid-friendly, comfortable spot that’s just as easy to tuck away afterward.
Next, get organized! A bookshelf or rolling cart works wonders for keeping board games, card decks, and puzzles in order. Use labeled bins or baskets to make everything neat and accessible. Stock your nook with family-favorite games. The board game Present Pile-Up is always a holiday hit at our home! It’s perfect for younger children because it’s fast-paced and easy to learn. Players race to catapult their "presents" into Santa’s sleigh, aiming to clear their pile first and secure their spot on the sleigh. It’s a guaranteed crowd-pleaser that keeps everyone laughing and coming back for more!
Gift-Wrapping Station: Functional and Festive
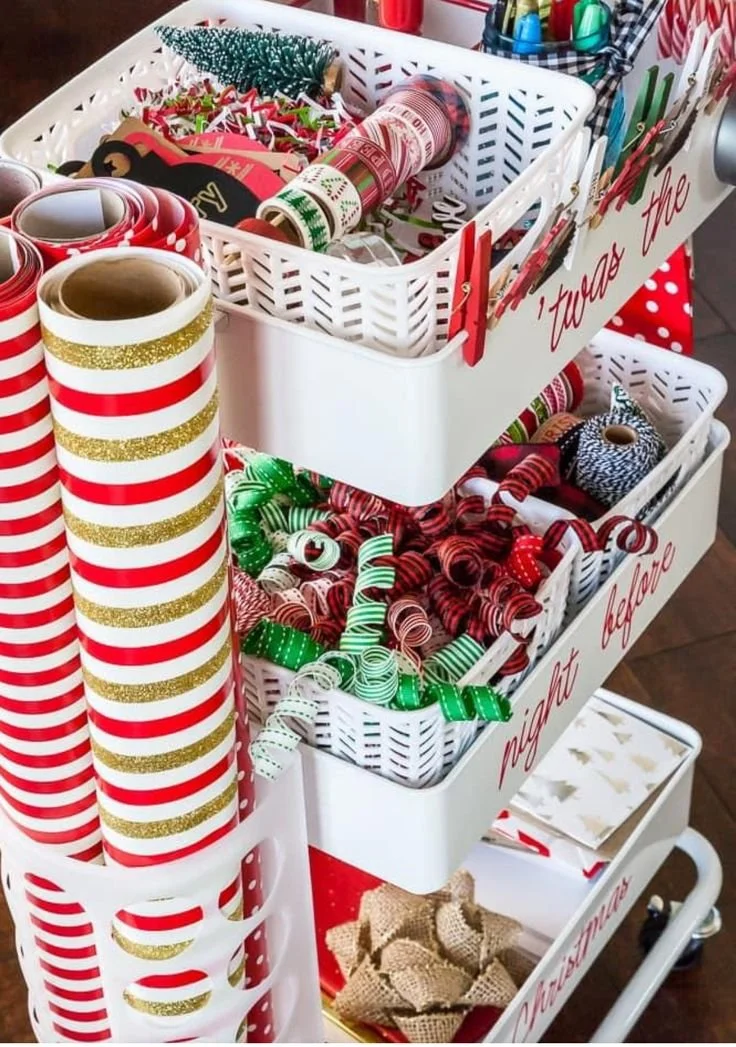
Gift-wrapping doesn’t have to be a chaotic search for tape, scissors, and paper. Transform this ritual into an enjoyable and organized process with a dedicated wrapping station! Even if space is tight, you can create a stylish and practical setup in an unused corner, nook, or even on a portable cart. The versatile IKEA Raskog cart is a perfect solution for a mobile wrapping station, bringing everything you need right to your workspace.
Get creative with storage to keep your supplies neat and within reach. Use jars, divided bins, or Tupperware to organize tape, scissors, ribbons, and tags. Upright baskets or wall-mounted racks are fantastic for holding wrapping paper rolls without taking up precious floor space. A flat surface is a must—whether it’s a portable cart parked near a table or a station set up next to an existing desk. Pro tip: Add a cutting mat to protect your surface and ensure clean, precise cuts!
Ornament-Making Station: Crafting Memories Together
There’s something truly magical about decorating your Christmas tree with ornaments crafted together as a family. We love bringing home leftover samples from our interior design firm and turning them into unique holiday ornaments. One of the best parts about making homemade ornaments is looking back at what the kids created when they were younger, each piece adding a heartfelt, personal touch to the tree.
One of our favorite family traditions is making salt dough ornaments. And, they’re easy even for younger children to make and can become sentimental keepsakes for loved ones. At our house, we enjoy decorating them with stamps, glitter, and ribbons, bringing each creation to life. We love hanging these handmade treasures on the tree as a family while holiday music plays and warm drinks are shared. It’s a festive afternoon filled with laughter and love.
Like a gift-wrapping station, having a workspace near a table is key. Use caddies, baskets, or tiered trays to keep stamps & stamp pads, brushes, glue, and other supplies organized. Clear jars are perfect for storing glitter and small items, making them easy to see and grab.
How to Make Salt Dough Ornaments
Ingredients:
2 cups flour
1 cup salt
About 1 ½ cups water
Food coloring or liquid watercolor (optional)
Directions:
Start with 1 cup of water and mix slowly into the dry ingredients. Add as much water as necessary to reach a kneadable consistency.
Combine flour and salt with an electric mixer and mix well. With the mixer on low speed, slowly add the water until the dough comes together in a ball. You may need as little as ½ cup of water or as much as 1 cup, so pour slowly and stop when the dough comes together and feels like cookie dough.
Wrap dough in plastic wrap and refrigerate for about 10 minutes to firm up.
On a very well-floured board, roll the dough out to ¼" thick. Cut out ornament shapes using various cookie cutters.
Transfer ornaments to cookie sheets prepared with parchment paper and poke a small hole in each using a small straw. Make a hole large enough for an ornament hook or ribbon.
We like to use our favorite rubber stamps to decorate our ornaments. Stamp the dough before baking the ornament.
Bake at 300°F for 30 minutes. The ornaments should harden but not brown.
Holiday Beverage Station: Warm Up Your Season
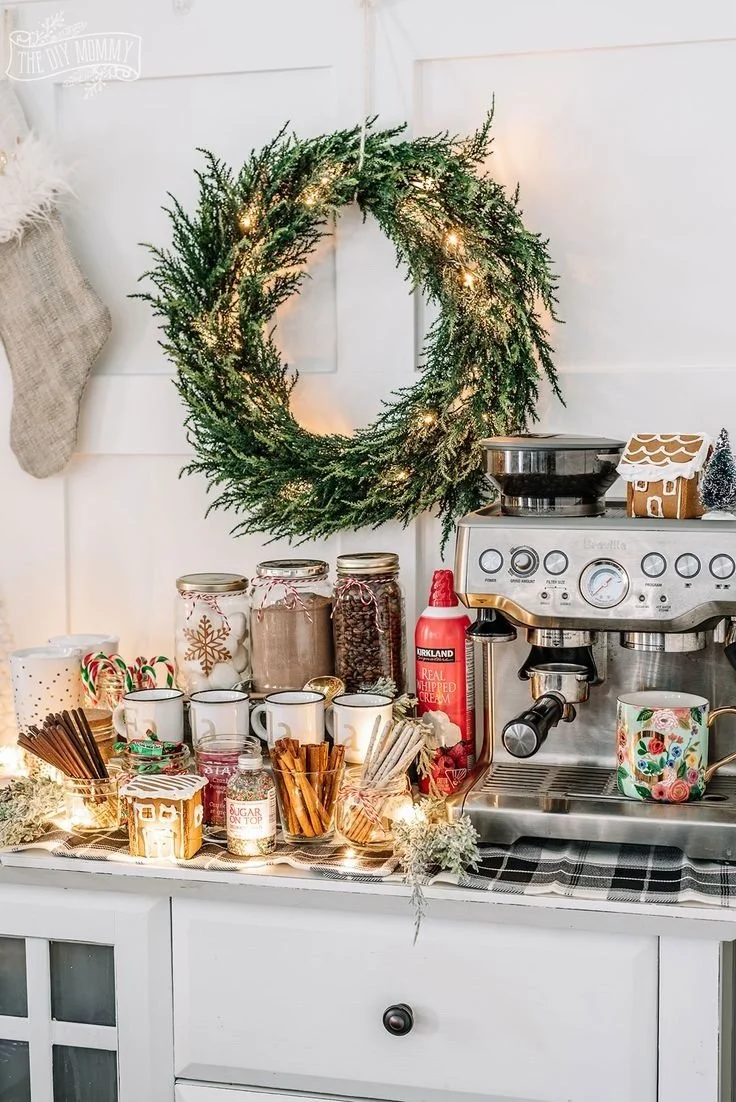
Add a dash of holiday cheer to your home with a festive beverage station that’s perfect for entertaining or simply cozying up with your favorite drink. Whether it’s a simple tray on the counter, a styled bar cart, or a dedicated nook in the kitchen, a holiday beverage station instantly elevates the season’s magic.
Choose a spot that works best for your space. A kitchen corner, dining room buffet, or rolling bar cart are all great options. Stock it with holiday essentials like festive mugs, a teapot, hot cocoa mix, marshmallows, and an array of fun toppings like candy canes, whipped cream, and cinnamon sticks. Consider adding a selection of wines, holiday spirits, or even pre-mixed seasonal cocktails for the adults. And, don’t forget to include beverages for the little ones, like warm apple cider or holiday-themed juice boxes so the whole family can enjoy the fun.
Make your station extra special by incorporating some seasonal flair. A garland, twinkling fairy lights, or a festive wreath can transform your setup into a true holiday highlight.
The holidays aren’t just about decorations; they’re about creating moments that become cherished memories. By reimagining and repurposing spaces in your home, you can create the backdrop for traditions that bring joy and togetherness. This year, let your home reflect the magic of the season. From our family to yours, we wish you a holiday season filled with love, laughter, and beautifully designed moments to treasure for years to come. Happy Holidays, everyone!


